How to Change Egg Tray Machine Molds Correctly?
Molds are the #1 wearing part of any egg tray making machine — our own FAQ answers the question “what are the wearing parts?” with a single word: molds.
Sooner or later, every plant has to take one off the drum and put another one on. Done well, a mold swap is a one-to-two-hour job that a trained operator runs like a drill. Done badly, it costs a week of crooked, ragged-edged trays — or strips a mounting thread that was fine that morning.
This guide is the written version of the mold-change training we deliver on site. At our Uganda 4×4 installation, the crew was swapping molds unaided within months of handover — and when a customer in Sudan reports three years without a major failure, timely mold rotation is a quiet part of that story. It complements the maintenance checklist (which tells you when to look) and the troubleshooting guide (which tells you whether the mold is really the problem).
First: Know Which Mold You’re Changing
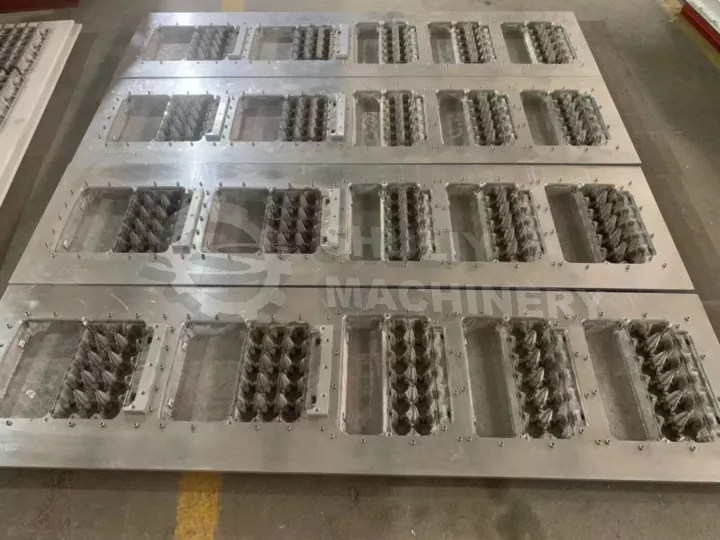
A pulp molding line has more than one mold, and the procedure differs slightly for each
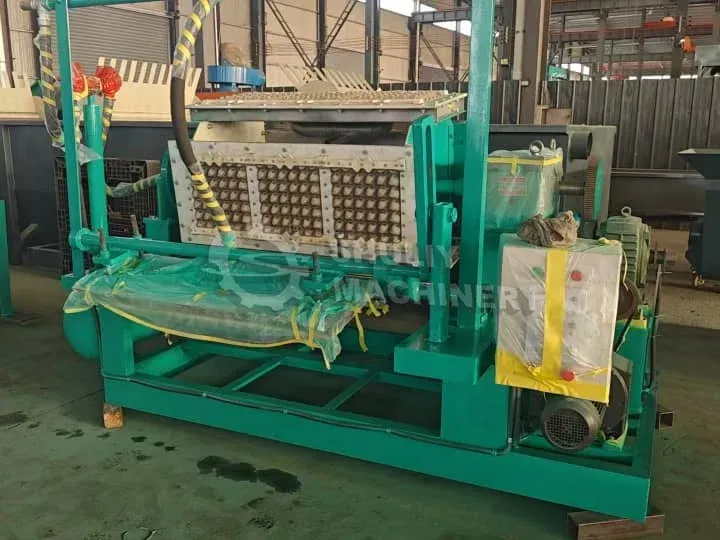
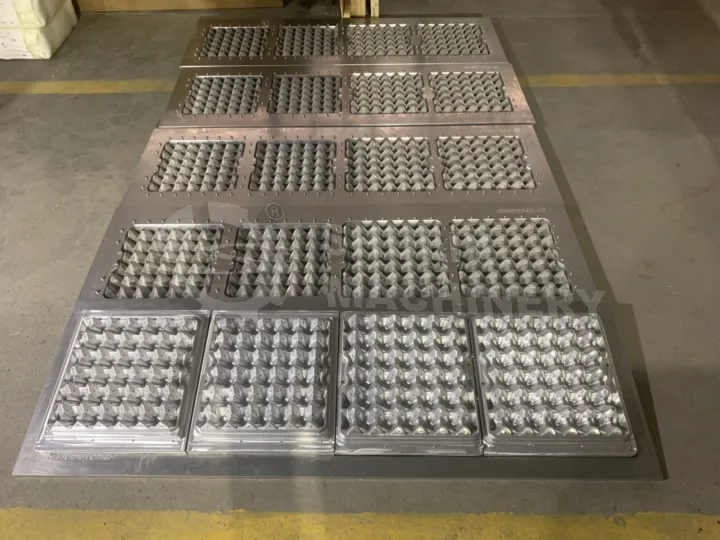
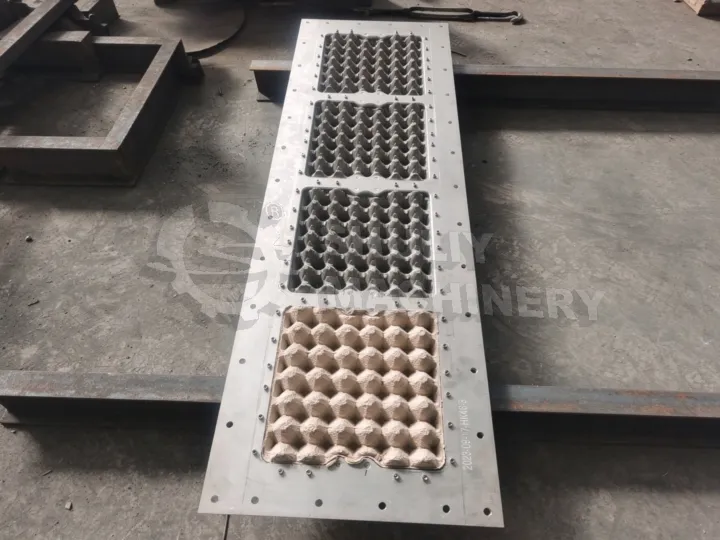
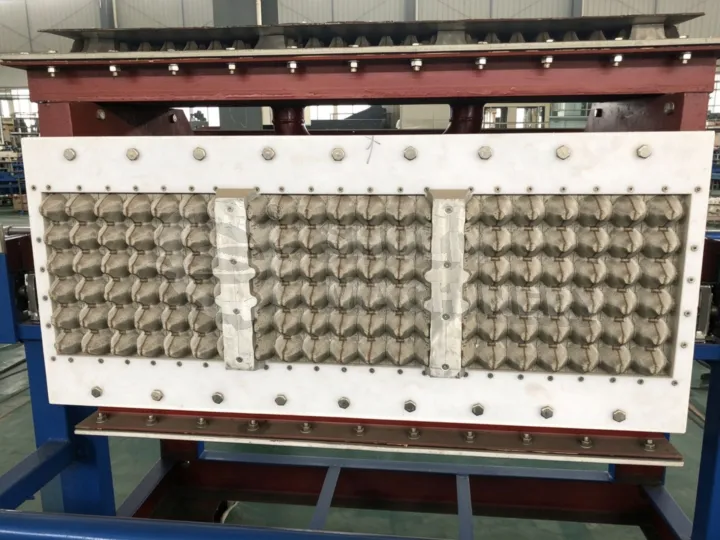
- Forming molds — bolted to the rotating drum, where the vacuum pulls pulp from the vat onto the mold surface in a 5–6 second cycle. These are the molds most plants swap, and the focus of this guide.
- Transfer molds — the second set that the compressed air blows the wet tray onto, ahead of the drying line. Their condition decides whether the tray lands flat or lands damaged.
- Pressing molds (carton lines) — heated tooling on the máquina de prensado en caliente that shapes and trims egg cartons. Treating them starts with draining the air tank daily; see problem 6 in our troubleshooting guide.
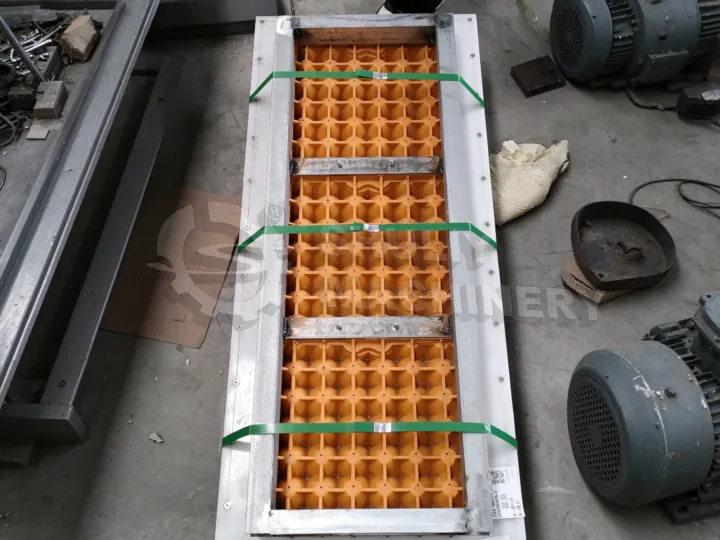
Forming and transfer molds come in two materials, and both carry a 12-month warranty from us.
| Mold material | Características | Practical notes |
|---|---|---|
| Aluminio | Lightweight; good wear, corrosion and oxidation resistance | The default on most Shuliy lines — easier to lift and handle during a swap |
| El plastico | Good thermal stability and surface hardness; excellent machinability | Easy to clean and strip residue from, valued on custom-shaped products |
When to Change a Mold — and When to Clean It Instead
The most expensive mistake in mold work is replacing a mold that only needed cleaning. The division is simple: drainage problems are usually cleaning; geometry problems are replacement. Replace a mold when you see
- Flash or ragged edges on finished trays that survive a thorough mold flush — the cavity surface or rim is worn.
- Dimensional drift: trays no longer sit in your standard packing, or lids and cartons stop matching, with pulp consistency unchanged.
- Persistent release problems on one station even after deep cleaning — the classic sign described in problem 2 of our troubleshooting guide.
- Visible damage: dents from dropped tools, lifted edges, or drainage pores enlarged by previous wire-cleaning.
- Weight variation locked to one station — if only some cavities produce the heavy or thin trays, that mold’s surface is no longer consistent.
Prepare Before You Touch a Bolt
Half of a clean mold swap happens before the machine stops. Plan it as its own job at the end of a shift or on the weekly maintenance day from our checklist — never mid-order under pressure.
- Have the replacement set ready, not on order. This is why we ship lines with spare molds: the Malawi 4×1 line left our factory with two mold sets in the container, and the Venezuela customer who runs trays and cartons on one machine bought three extra sets for product changeovers.
- Isolate power and lock out. The drum must not rotate during the swap — a hand-tightening operator plus an accidental start is the worst accident pattern this job has.
- Gather tools: correctly sized sockets or spanners for the mold fasteners (the wrong size strips heads), a soft brush, clean rags, penetrating oil for stubborn bolts, and a marker.
- Clear a working area beside the drum — a flat, clean surface to lay molds with their fasteners grouped per mold. Trays and molds dropped on a wet, fiber-covered floor get damaged in the moments you least want it.
- Two people for the job. Aluminum molds are the lighter option, but a full-cavity mold is still an awkward plate to control while undoing the last fastener.
Step-by-Step: Changing Forming Molds on the Drum
- Document before removal. Photograph each fastened mold in position and mark its orientation relative to the drum. When a set goes back on later, this photo is the alignment reference.
- Loosen and remove the fasteners with the machine isolated. Support the mold before the last bolt comes out; keep every bolt with its own mold — never a shared box.
- Pull the mold away cleanly. If it has swollen onto its seat from dried pulp, do not pry with steel against the drum face — flush the seam with water and work it free.
- Clean the mounting surface on the drum. Every grain of dried fiber left between drum and mold becomes an alignment error and a vibration point once the machine runs.
- Inspect the removed mold. Decide its fate now: flush the drainage holes with water and soft tools (never a steel wire — it enlarges the pores and ruins forming quality), and either send it to the deep-clean shelf or retire it if the signs from the earlier section apply.
- Mount the replacement mold against your reference marks, start all fasteners by hand to protect the threads, then tighten in the sequence given in your machine manual. On multi-station drums change one station fully before moving to the next.
- Rotate the drum by hand through a full turn. Feel for fouling against the vat or transfer side before electricity is involved; any gap or rubbing adjustment is far easier to see now than after a trial run.
- Refit guards, restore power, and run a wet trial at low speed with pulp held at your standardized consistency (recipe in our pulp-making guide). Watch release and transfer on the new station specifically, not just the overall output.
- Verify with measurements, not impressions: spot-weigh trays from the new mold against the old baseline (~80 g on a standard tray) and inspect cup edges and depth. After the first hour of running, walk back and re-check the fasteners — settled seats show up here.
- Log it. Date, station, mold set serial if marked, and the reason for the swap. A mold log is what turns replacement from guesswork into planning — it is the same notebook philosophy as the shift log in the maintenance guide.
Changing Molds to Change Products
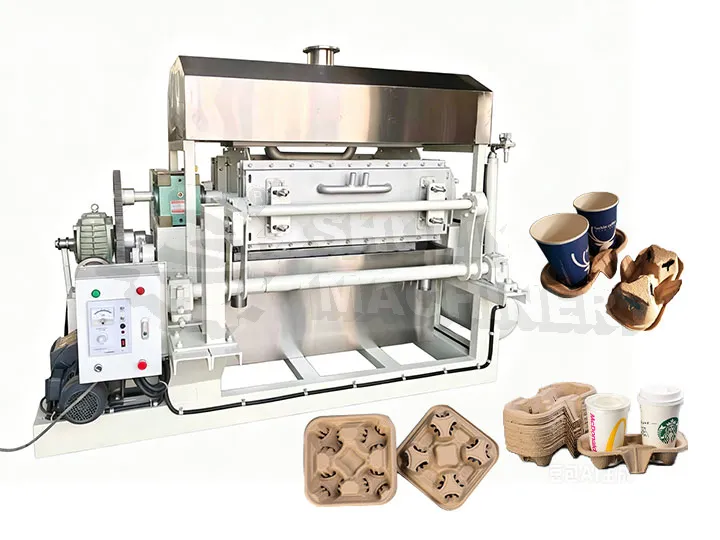
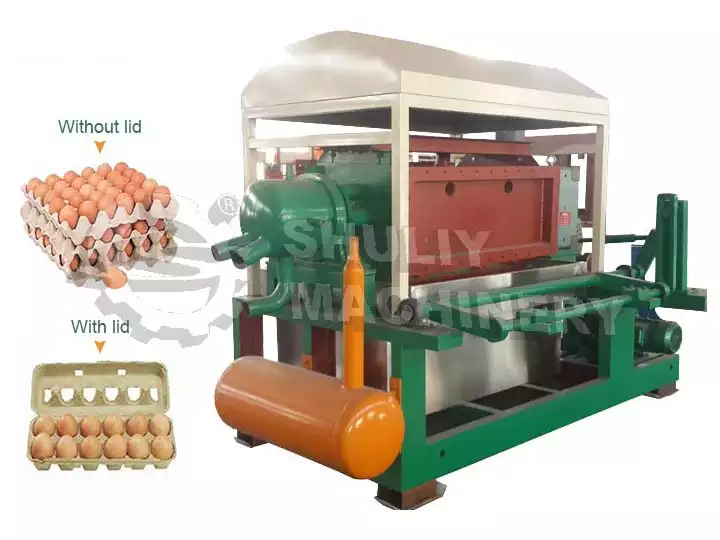
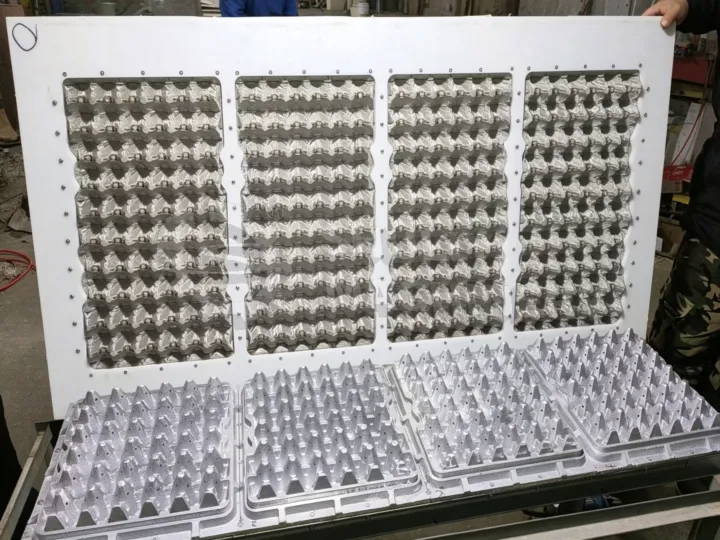
The same bolt-on principle is what lets one machine make more than egg trays. Swapping to a different cavity set converts the line to egg cartons, fruit trays, wine trays, nursery trays or cup holders — custom molds are made to your product’s shape and egg size. For a changeover to be quick and repeatable, three habits matter
- Keep complete matched sets — forming, transfer and (on carton lines) pressing tooling for one product belong to one labeled set. Mixing cavities across sets is how matched clearances stop being matched.
- Store molds flat, dry and off the floor, with fixing holes facing up and nothing stacked on the cavity face. A stored mold is a precision part, not scrap metal.
- Record the per-set alignment marks photographed at fitting, so the second and tenth changeover are as fast as the first.
Five Mistakes That Ruin Molds and Lines
| Mistake | What It Costs You |
|---|---|
| Clearing drainage holes with steel wire | Enlarged pores — permanent release and weight defects on that mold |
| Forcing the wrong socket on a fastener | Stripped heads, a mold stuck on the drum, hours of extra work |
| Mixing cavities from different mold sets | Station-to-station weight variation you will chase for weeks |
| Reusing a mold that shows flash or drift “for one more week” | A whole batch of rejected trays plus the rush order for replacements |
| Skipping the wet trial and weight check | A misaligned mold discovered only when the dryer is full of cracked trays |
Build a Rotation, Not a Repair
The plants that never “change molds in a crisis” are the ones that rotate them on schedule: production set on the drum, spare set deep-cleaned and inspected, swap on the weekly maintenance day, retired sets logged and reordered before the shelf runs empty.
That routine keeps the daily and weekly checks doing the diagnosis, and turns the swap itself into the calm, documented procedure above — exactly the difference between our Sudan line’s three-year record and the mid-production seal-and-mold emergencies we fly to fix.
FAQ on Changing Egg Tray Machine Molds
How long does it take to change máquina de bandeja de huevos molds?
With a prepared workspace, matched tools and a spare set on site, removing, cleaning the seat and refitting is a per-mold job of minutes — a full changeover including wet trial and weight checks is realistically planned as half a shift. The hours disappear when teams skip the preparation steps, especially photographing alignment before removal.
Can our own operators change the molds, or do we need a manufacturer engineer?
Operators can and should do it. At our Uganda installation the crew changed molds without external help within months of handover. Involve manufacturer engineering when a new mold still rubs the vat or transfers poorly after correct fitting, or when the drum seat itself looks damaged.
How often should egg tray molds be replaced?
There is no fixed hour count — replace on condition, not calendar. Watch for flash on tray edges, size drift, one-station weight variation and release problems that survive deep cleaning. Molds carry a 12-month warranty from us, and keeping a two-set rotation spreads replacement cost across the year instead of dropping it on you in one stopped week.
Can one machine run egg trays and egg cartons with different molds?
Yes, this is normal practice. Carton lines add heated pressing tooling to the forming and transfer molds, and the whole set changes over as matched product families. Customers like our Venezuela buyer order extra mold sets precisely so one machine can serve both product lines.
How do I clean molds I have taken off the machine?
Flush from the back side with clean water to push fiber out of the drainage holes, soak overnight for dried pulp, and clear remaining blockages with soft tools only. Never use steel wire or drill a blocked pore. Dry the mold fully, then store it flat and labeled with its alignment photo until it goes back on the drum.
Get the Swap Right, Then Make It Routine
A mold change is not a repair — it is scheduled care for the one part of your line that decides every tray’s shape, weight and strength. Prepare the spare set, isolate the machine, document what you remove, verify with the wet trial, and log the result.
And if your plant has no spare molds on the shelf yet, that is the first order to place with your machine’s model number: mold supply, alignment advice and video-call support during your first changeover are part of the after-sales service on every Shuliy line.